 PhoinixDR
Desktop guide
PhoinixDR's desktop application walks through the same steps as the command line: choose a source, scan, understand what was found, preview, recover. It never writes to the source.
Starting
- Windows: run
PhoinixDR-<version>-windows-x64-portable.exe. Nothing is installed (see Windows portable release). To scan a physical disk or a USB stick, right-click the executable and choose Run as administrator; disk images do not need that. - Linux: run
phoinix-desktop; physical devices needsudoor a udev rule that grants read access to the disks.
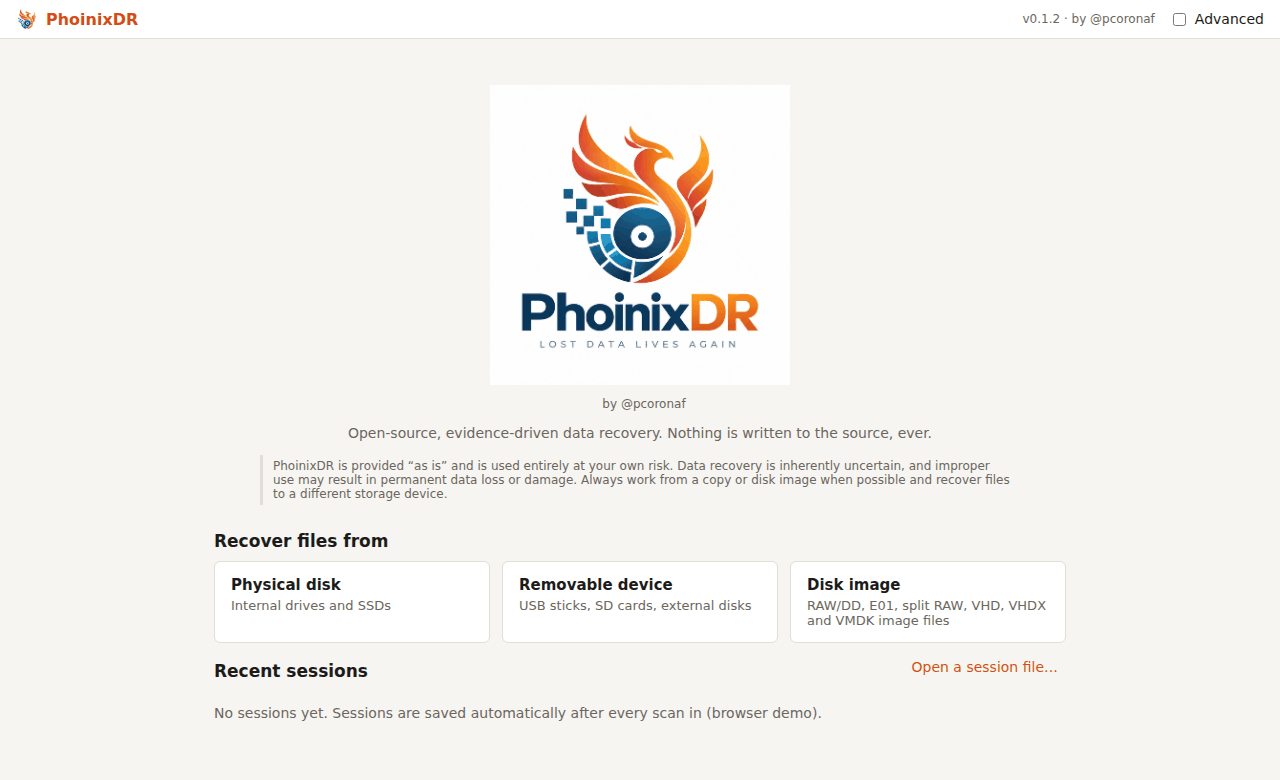
The home page shows the version and author in the top bar and lists recent scan sessions. A session of a physical device is labelled with the drive's model and serial number, so scans of different drives that occupied the same device path are told apart.
Two ways to recover
PhoinixDR can work on the device itself or on an image of it. Pick one before you start; the desktop guide below applies to both:
- Directly from the device, in one step. Choose Physical disk or
Removable device; when the device shows as not accessible, press
Restart as administrator and accept the system prompt (or start
PhoinixDR elevated yourself: Windows right-click, Run as
administrator; Linux
sudo). Then scan and recover. Fastest; PhoinixDR only ever reads from the device. - From a disk image. First make an image of the device with an
imaging tool (FTK Imager or Arsenal Image Mounter on Windows,
ddorewfacquireon Linux) and then open the image file in PhoinixDR with Disk image. PhoinixDR itself needs no elevation for this; the imaging tool does, since it reads the same raw device. This is the recommended path for a failing drive, for anything you may need to examine again, and for forensic work (E01 hashes are verified and reported).
Both paths give the same results on a healthy device. In both, recover to a different disk than the one you are recovering from.
1. Choose a source
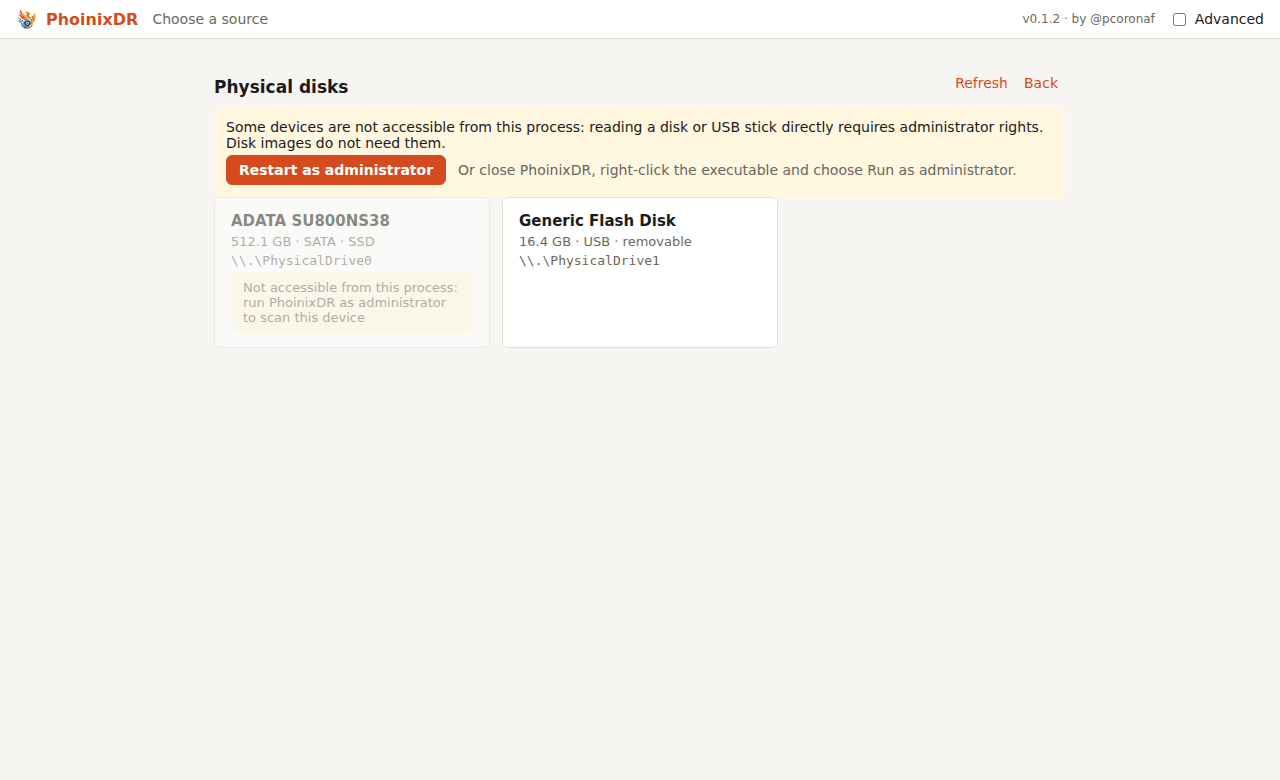
| choice | what it lists |
|---|---|
| Physical disk | internal drives and SSDs |
| Removable device | USB sticks, SD cards, external disks |
| Disk image | a file: RAW/dd, split RAW, E01 (and split E01), SMART, VHD, VHDX, VMDK |
A device that cannot be opened is shown greyed as Not accessible from
this process, and a notice offers Restart as administrator: PhoinixDR
asks the system for elevation (the Windows UAC prompt, the polkit password
dialog on Linux) and starts an elevated copy of itself. On Windows the
current window closes as soon as the new one starts; on Linux it stays
open until the new window appears. Declining the prompt leaves the current
window as it was. The same notice appears on the home page when no device
can be listed at all. Starting the executable with Run as administrator
or sudo yourself works too. Disk images never need elevation.
2. Scan setup
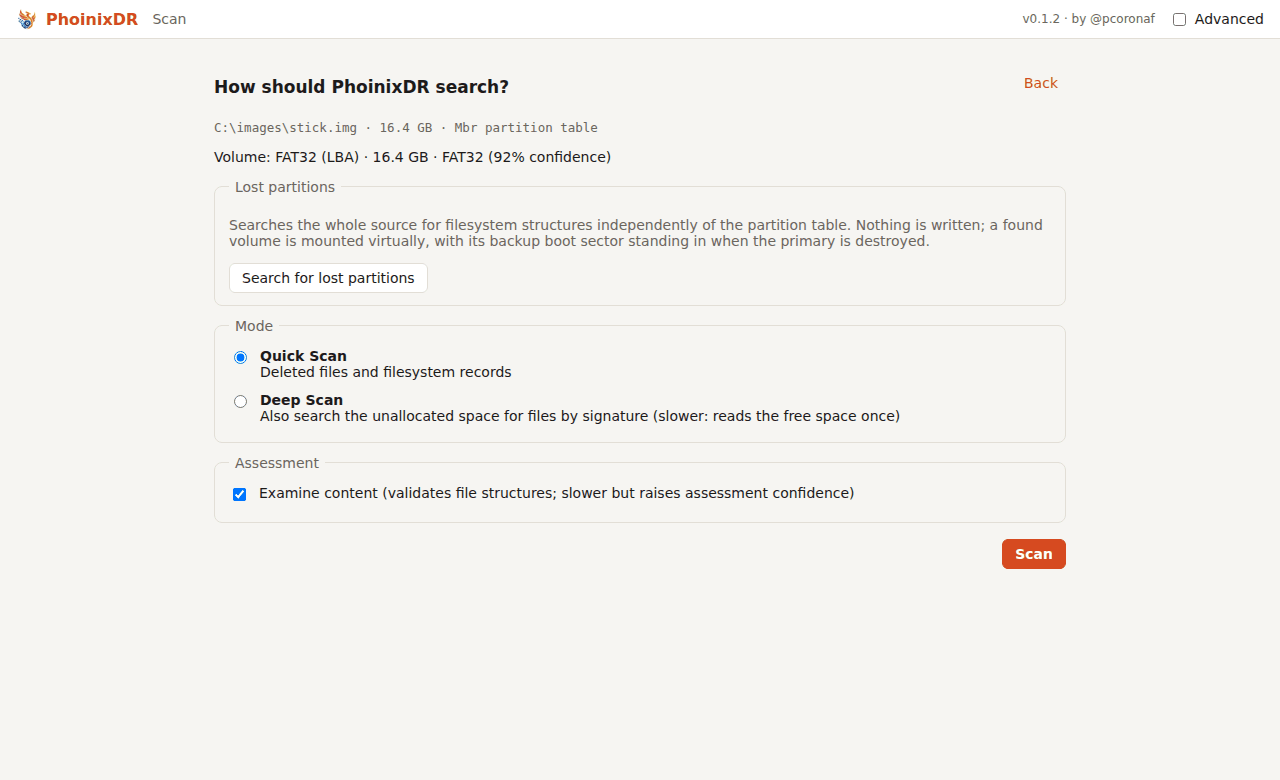
The setup page shows the source, its partition table and every volume with its filesystem and detection confidence.
- Image container (image files only): format, variant, segment count, compression, the acquisition header of an E01 (case number, examiner, dates, software), stored hashes, and a Verify hashes button that reads the whole image and compares its MD5/SHA-1 with the stored ones.
- Volume: pick a partition when the source has several.
- Lost partitions: Search for lost partitions scans the whole source for filesystem structures independently of the table. A found volume can be selected and is mounted virtually; when its primary boot sector is destroyed the backup is used in memory. The partition table is never modified.
- Mode: Quick Scan reads filesystem metadata (deleted files and records). Deep Scan also carves the unallocated space for files by signature; it reads the free space once. Volumes without a recognised filesystem can only be deep-scanned.
- Deep scan options: carve the whole volume instead of only the free space; restrict the file types.
- Assessment: Examine content validates file structures (JPEG, PNG, PDF, ZIP/DOCX, …) and raises assessment confidence; turning it off is faster.
3. Scanning
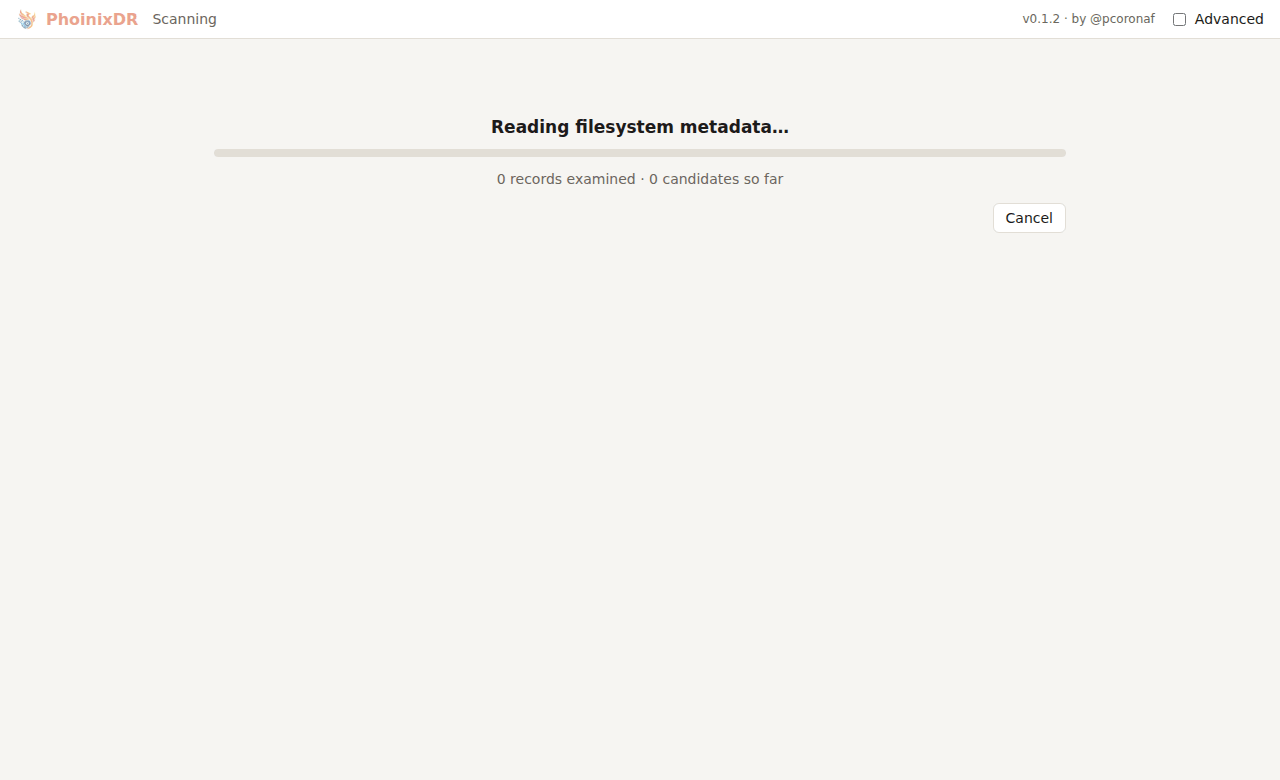
Progress shows the phase, counts and throughput. A deep scan has two carving stages, each with its own progress: the header search reads the free space once (bytes scanned), then Examining carved files goes back to every hit to assemble, validate and score the file (hits examined). The second stage reads the source again one hit at a time; its progress line shows the bytes read. The scan can be cancelled in any phase; whatever was found so far is kept and saved as a partial session.
A region the device refuses to read (an I/O error or a driver timeout) does not stop the scan: it is retried in smaller blocks, what still fails is skipped and treated as zeros, the progress page and the results summary report how much was unreadable, and a carved file that overlaps such a region says so in its evidence. Content examination reads at most a few megabytes per carved file; zero sampling, which detects discarded or wiped clusters, runs regardless of the Examine content option.
4. Results
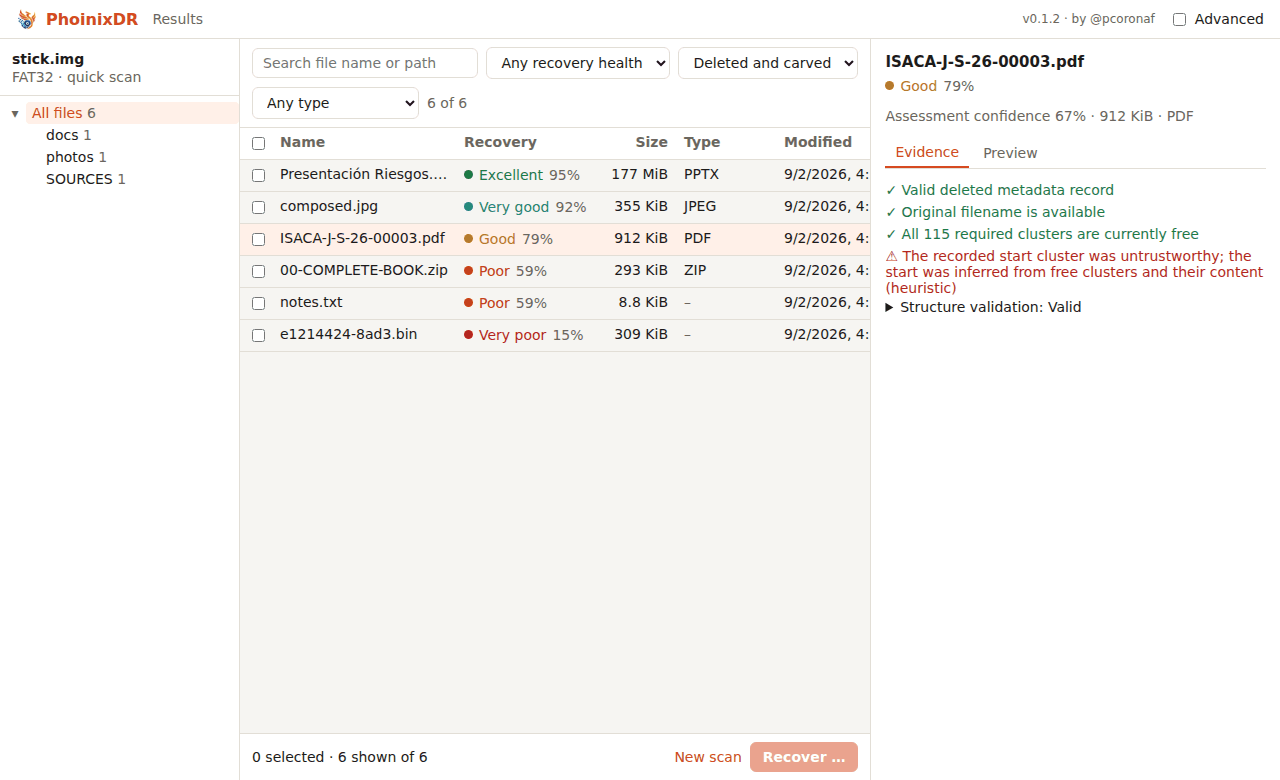
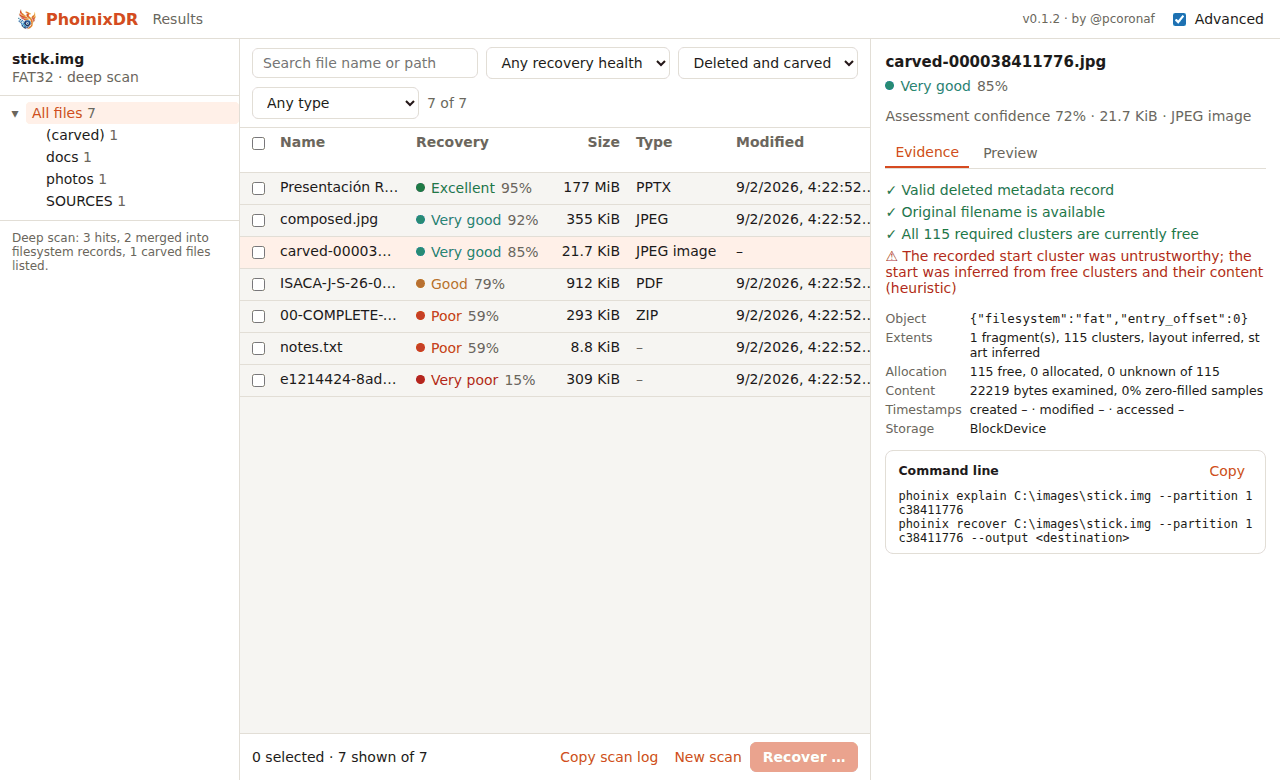
Every row is a recovery candidate:
| column | meaning |
|---|---|
| name | original name, or a synthetic carved-… name for carved files |
| health | likelihood that recovery returns the original bytes, with its category (Excellent … Unrecoverable), and confidence in that estimate |
| size | logical size when known |
| type | detected or expected file type |
| path | original path; (uncertain) when the directory record was reused; journal and carved tags say how the file was found |
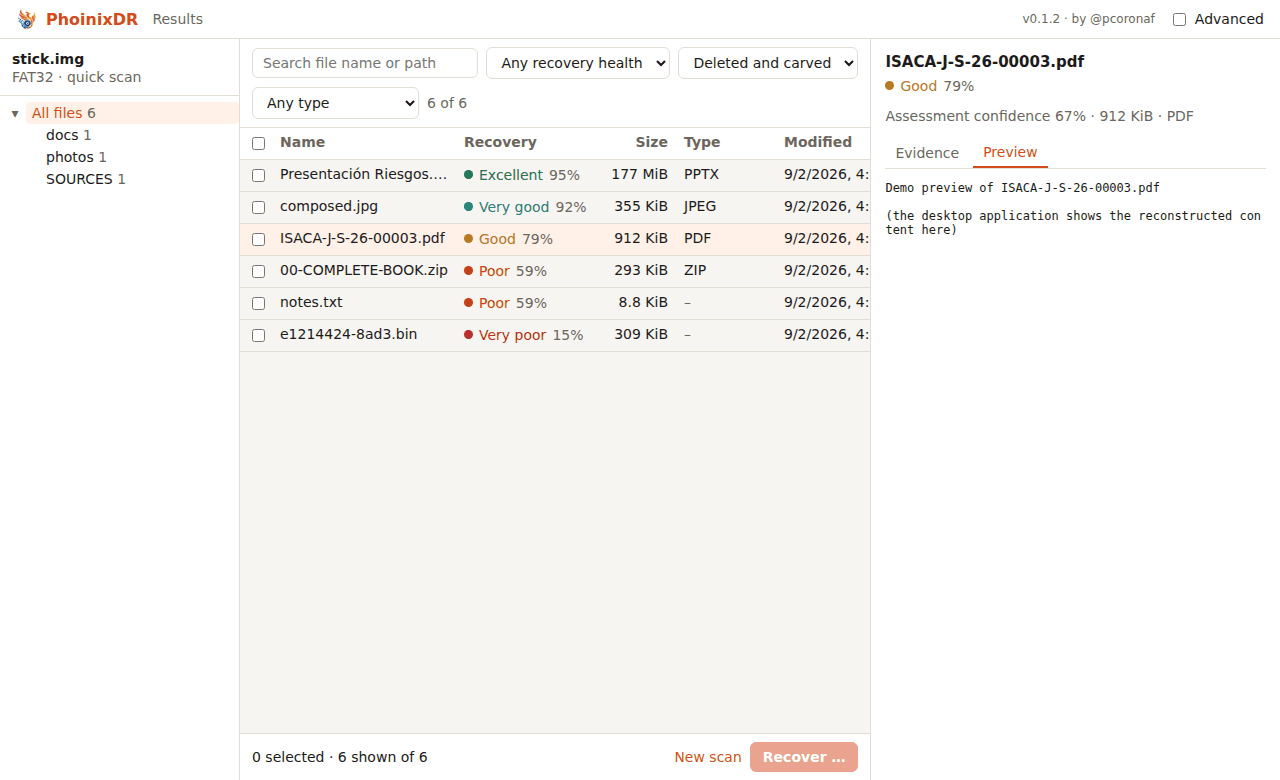
Filters narrow the list by text, health category, type and origin (metadata or carved). Selecting a row opens the detail panel:
- the evidence: every positive and negative reason behind the two numbers, and diagnostics such as reused clusters, journal transactions or inferred starts;
- a preview: images are rendered, text is shown, other content is hex-dumped; previews read the source, never write it.
Read the evidence before trusting a number. "Allocated to active filesystem data" means the clusters have been reused, not that every byte is gone; "Unrecoverable" means no extent of the content could be located, in which case a deep scan may still carve it.
5. Recovery
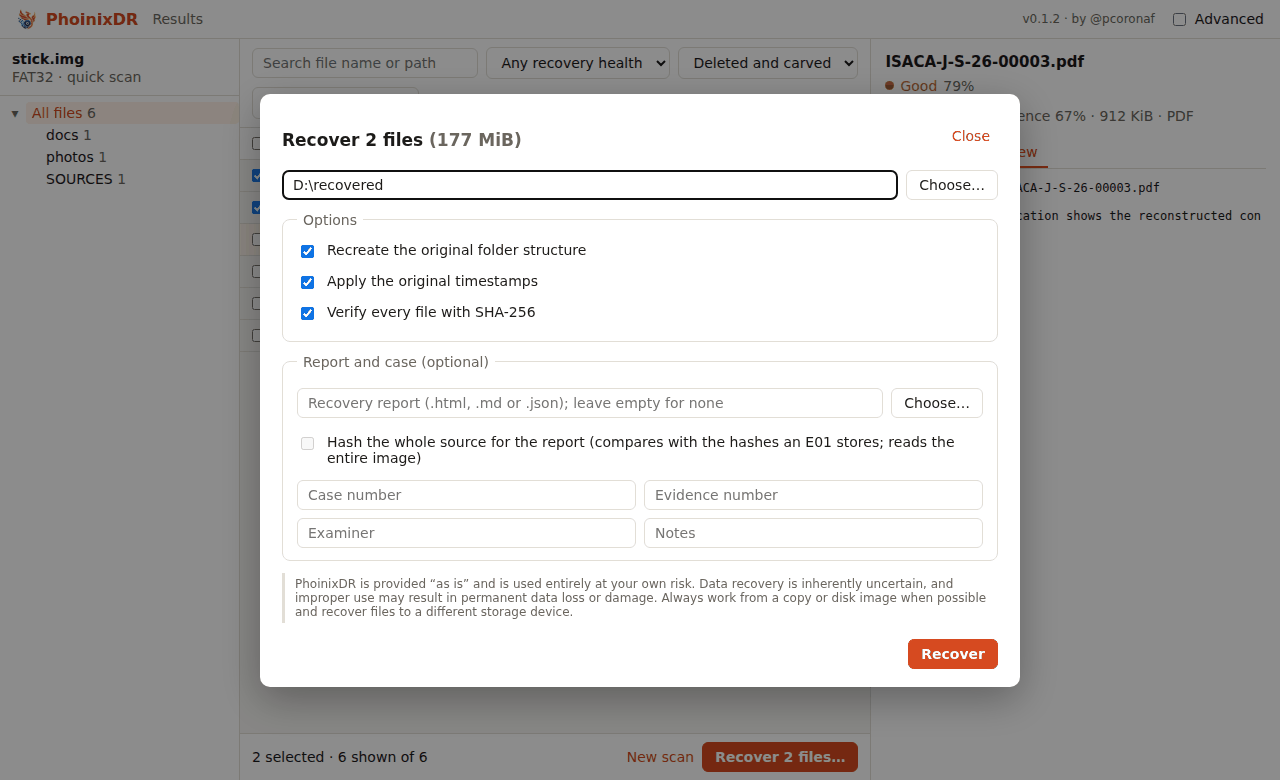
Select rows and press Recover:
- Destination: a directory on another disk. A destination on the source disk is refused; the expert override is for people who know they are risking the data they are recovering. A destination that is the image file itself is always refused.
- Options: recreate the original folder structure, apply original timestamps, verify every file with SHA-256.
- Report and case (optional): choose a report file (
.html,.mdor.json), optionally hash the whole source for it, and fill in case number, evidence number, examiner and notes. Fields are prefilled from the E01 acquisition header when the source has one.
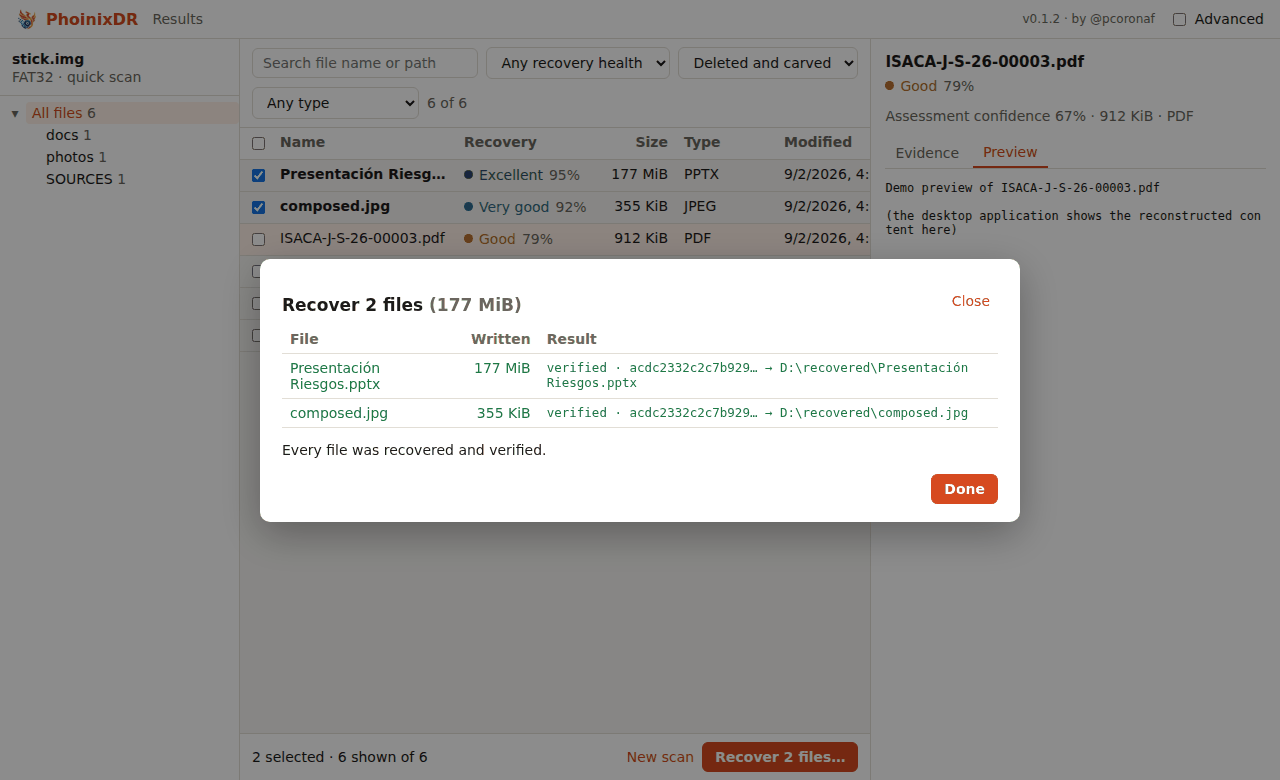
The result table shows every file with bytes written, verified or
PARTIAL, the SHA-256 prefix and the output path. The report path is
shown when one was written.
Advanced mode
The Advanced checkbox in the top bar shows the technical detail behind the interface. It changes nothing about the scan or the recovery.
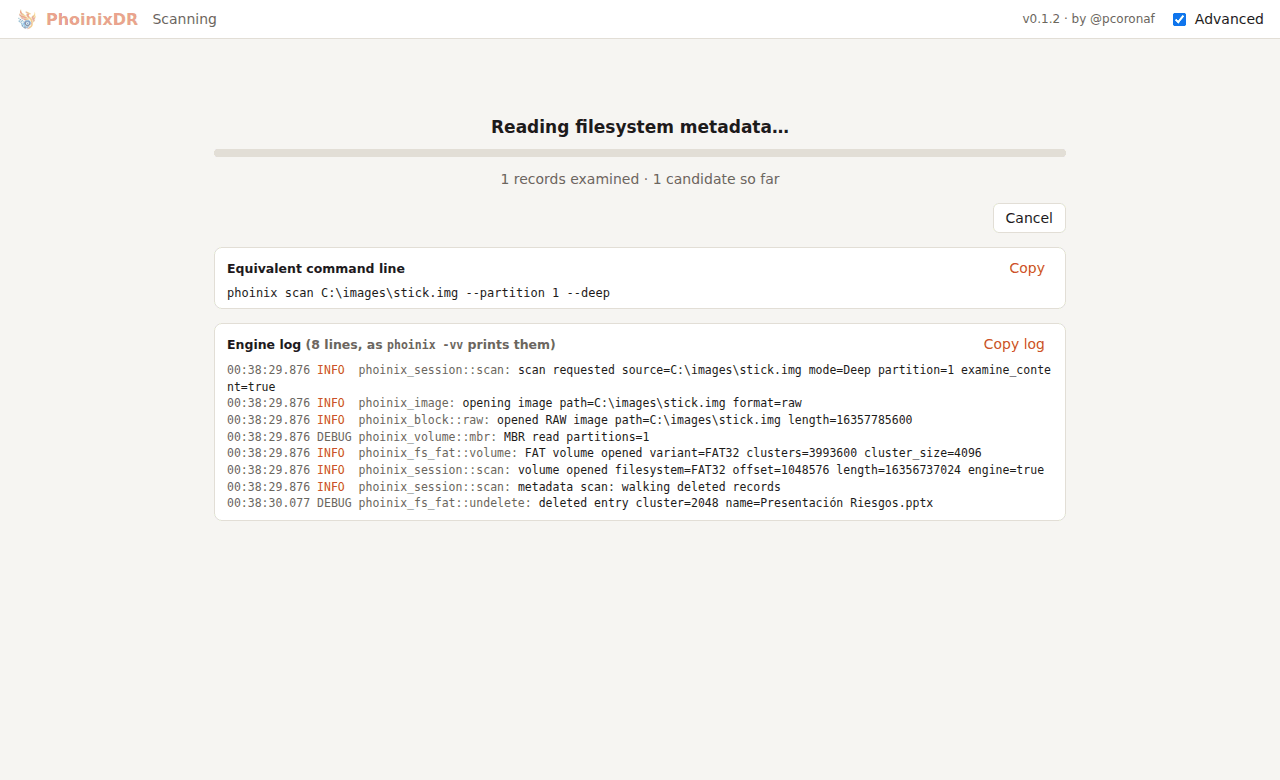
- Equivalent command line. While a scan runs, the page shows the
phoinix scan …command that reproduces it, with the same source, partition, mode and carving options. In the results, the detail panel shows thephoinix explainandphoinix recovercommands for the selected file. Every command has a Copy button. - Engine log. The same records the command line prints with
-vv: which image or device was opened, the filesystem found, how many records were walked, the carving pass, and the counts at the end. The log is forwarded from the engine only while Advanced is on; it is never written to disk by the desktop application and never contains recovered content. Copy log puts it on the clipboard for a bug report, and the results page keeps Copy scan log available afterwards. - In the results: a Ref column with the candidate's filesystem reference (the value the commands above use), the structure validation checks expanded, and a diagnostics block with the raw evidence (object, extents, allocation, content samples, timestamps, storage).
Secure erase
PhoinixDR can also do the opposite of recovery: overwrite a whole disk, one partition or the free space of a volume so that nothing deleted can be recovered, verify the result, look at the result with its own recovery engines, and write a sanitization certificate. It is a separate mode, reachable only from the home page, in a separate colour, and it is the only part of PhoinixDR that writes to a device (see ADR-0014). Everything it writes is lost for good; read the warnings on each page.
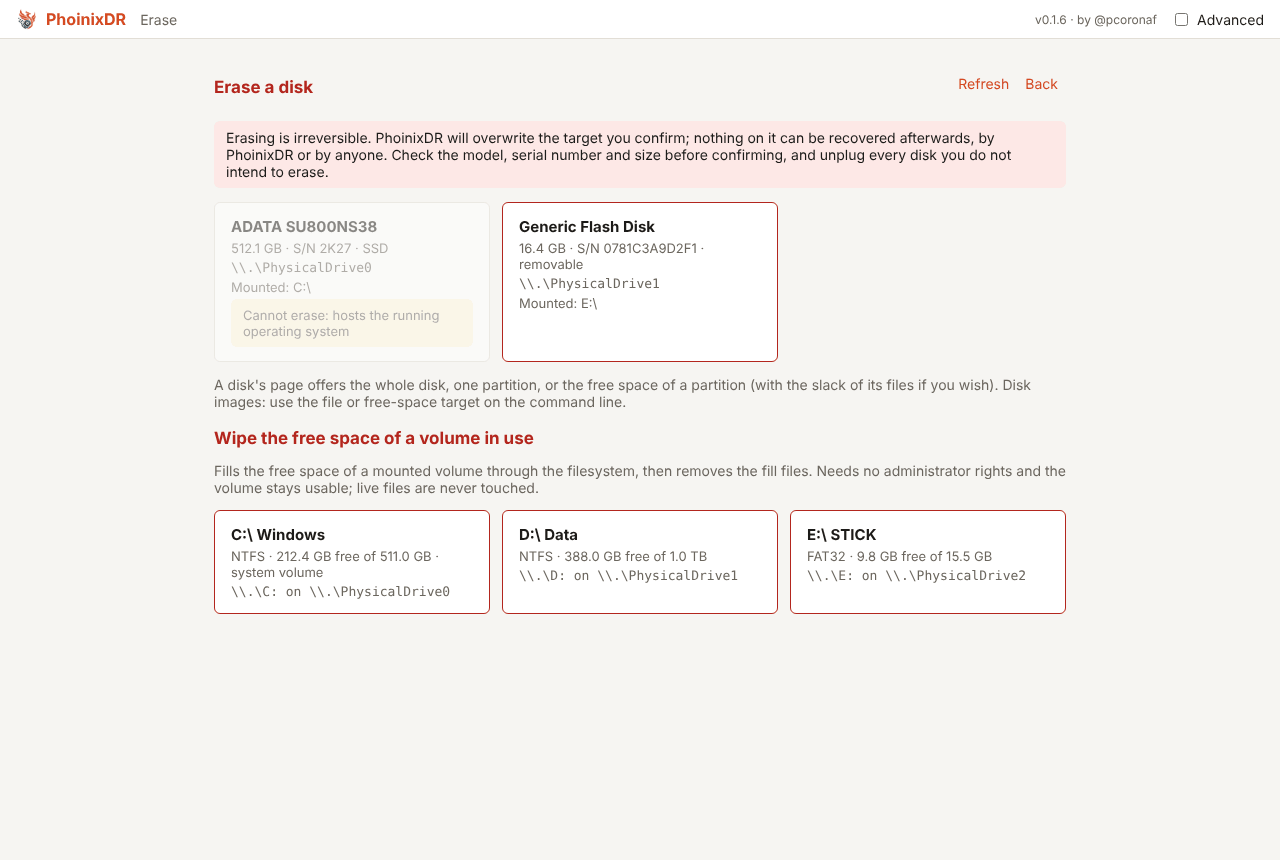
- Choose the disk. The system disk, the disk the executable runs from, the disk that holds the sessions directory and a source open for recovery are refused. Disks with mounted volumes are listed with their drive letters; on Windows the volumes are locked and dismounted before the first write, on Linux you unmount them first. When a disk says it is not accessible from this process, the page offers the same Restart as administrator button as the recovery pages.
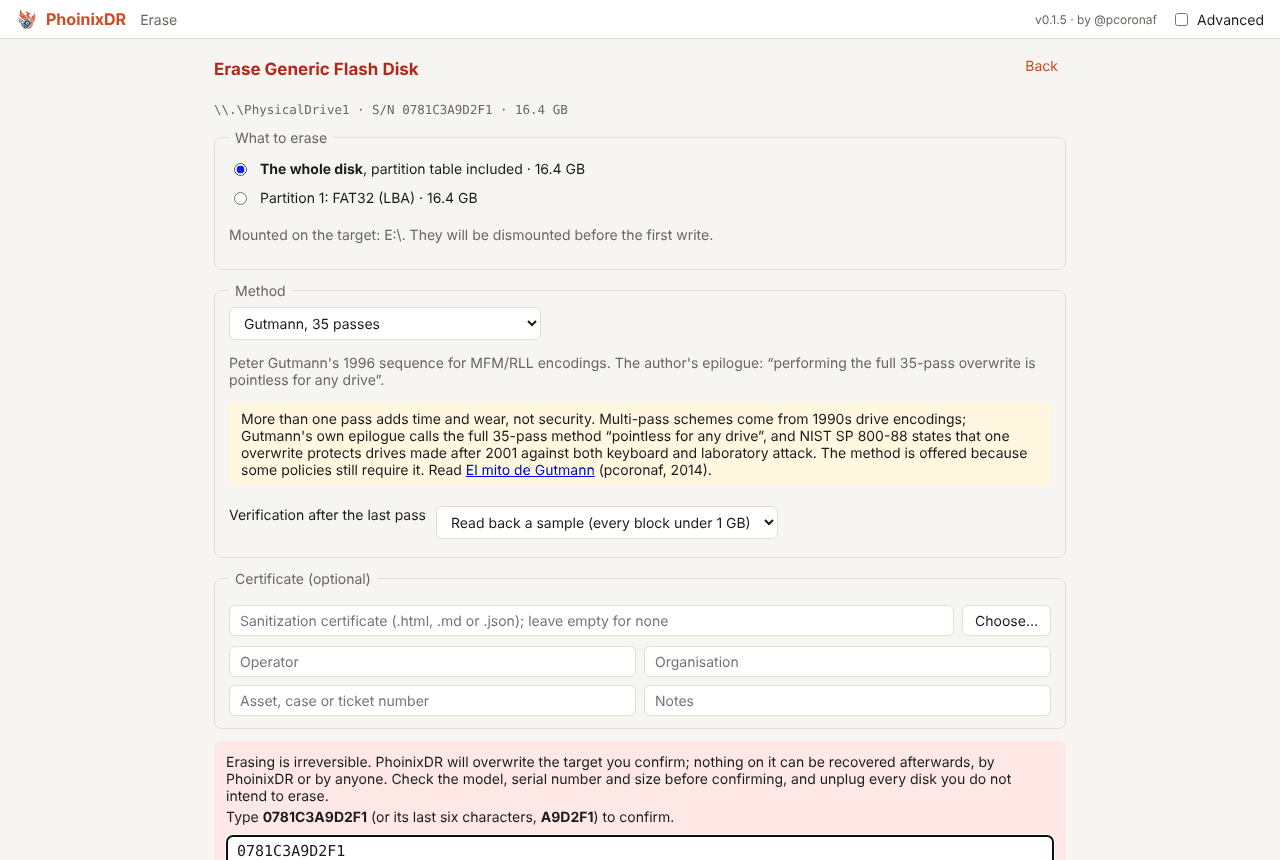
- Choose what to erase: the whole disk, partition table included; one partition (its table entry stays); or only the free space of a partition, which overwrites every cluster the filesystem marks as free and leaves the files in place (see Free space below).
- Choose the method. The default, one pass of zeros, is NIST SP 800-88 Clear and is enough on any drive made this century. The other methods are listed with what they are worth: random, NIST (random plus the verification 800-88 asks for), the DoD 5220.22-M sequences (obsolete since 2007), Schneier, VSITR and Gutmann. Choosing any method with more than one pass shows a warning: the extra passes add time and wear, not security, as Gutmann's own epilogue and NIST 800-88 state; read El mito de Gutmann (pcoronaf, 2014). They are offered because some policies still require them.
- Solid-state devices. An overwrite reaches the logical blocks, not the physical cells: the controller remaps writes, and over-provisioned or retired cells are never touched. On an SSD or a USB stick the page says so; an overwrite is a software-level clear, enough against recovery software, and a real purge needs the device's own sanitize command (planned for M12.4) or physical destruction.
- Verification. After the last pass PhoinixDR reads the target back through its read-only recovery stack and compares it with what was written: every block for targets under 1 GB, a spread sample of 4096 blocks otherwise, or everything if you choose Read back everything. Random passes are verifiable too: the run's seed is recorded and the data is regenerated for the comparison.
- Post-erase scan. Optionally, after the verification, PhoinixDR looks at the target with its own recovery engines: a quick scan walks the filesystem metadata and counts the deleted records whose content is still something other than zeros; a deep scan also carves the erased space by signature, which takes as long as a recovery scan. The certificate records what the scan found. After a whole-disk or whole-partition overwrite the expected finding is "no filesystem"; after a free-space wipe it is "no record with content and nothing carved".
- Certificate. Optionally choose a file (
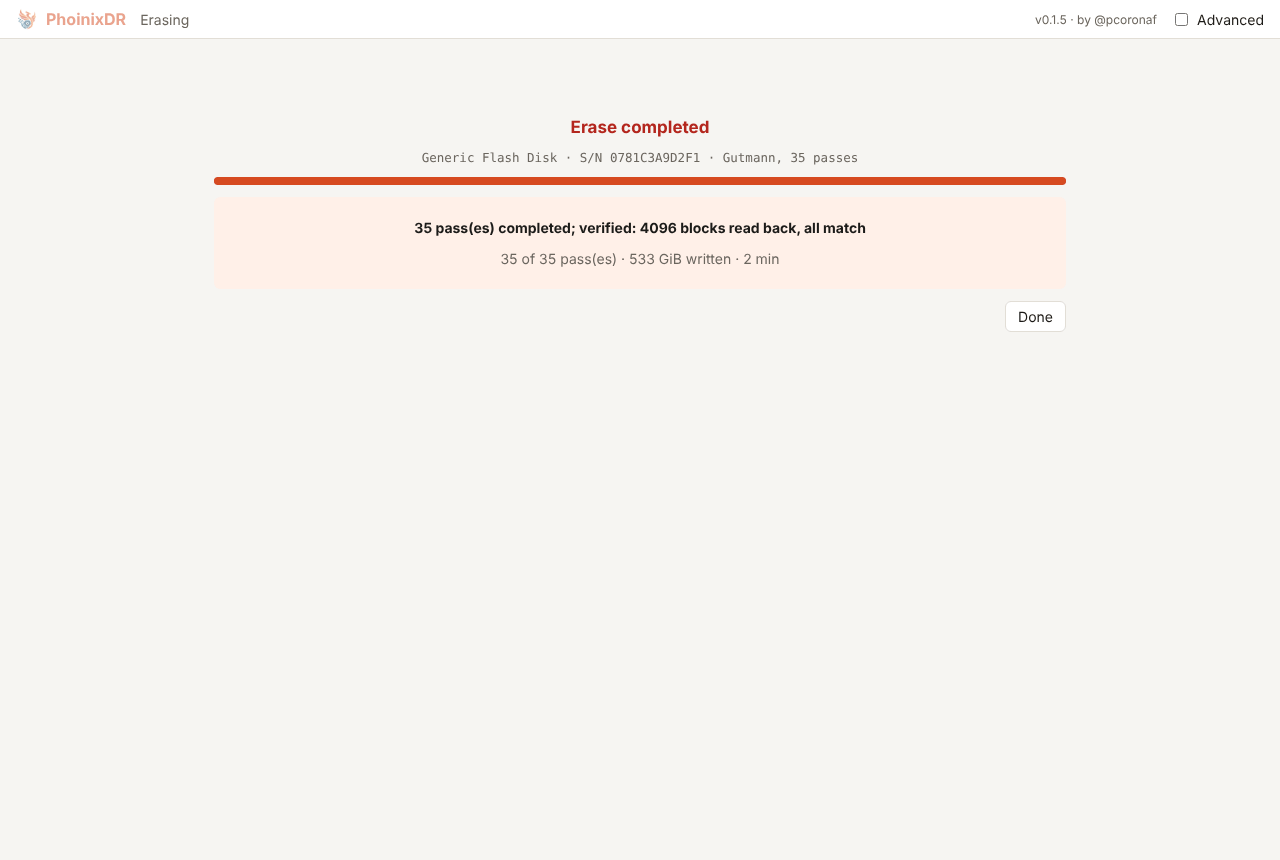
.html,.mdor.json) and fill in operator, organisation, asset number and notes. The certificate is a NIST SP 800-88 §4.8 record: device model, serial number and capacity, target range (or the volume, its free space and slack), method and passes, times, bytes written, the verification result, the post-erase scan, and every region the device refused to write (those bytes are not erased, and the certificate says so). - Confirm. Type the device's serial number (or its last six characters) and press Erase. A five-second countdown follows during which Cancel is the only control.
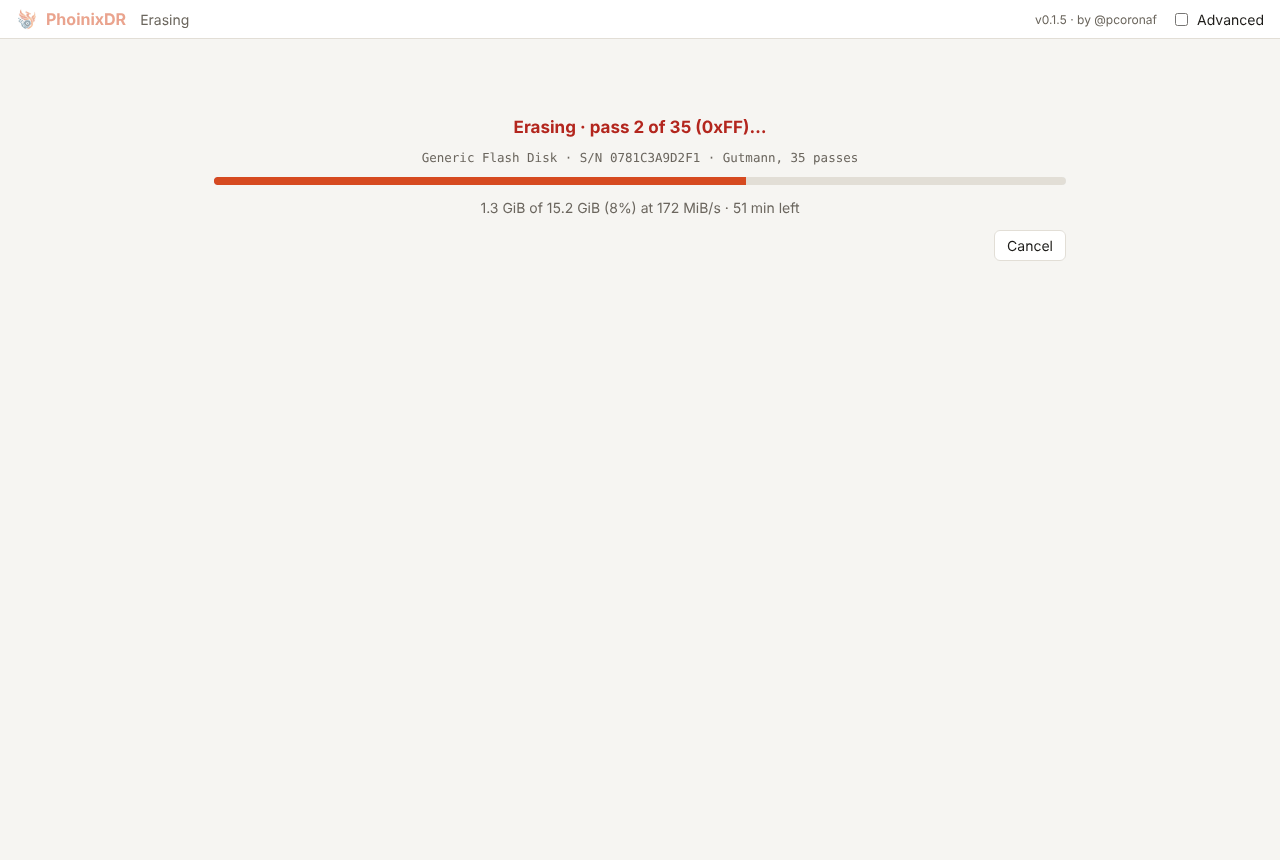
Cancelling leaves the target partially erased and offers to resume from the last block written, with the same seed, so the certificate still describes one complete run. A region the device refuses to write is retried in smaller blocks, then written off and listed in the certificate. A failing drive is therefore an incompletely erased drive: if the data must not leave your control, destroy it.
Free space
Deleting a file frees its clusters; the data stays there until something overwrites it, which is exactly what recovery relies on. A free-space wipe overwrites those clusters and nothing else, so the volume keeps working and its files stay. PhoinixDR offers it in two ways.
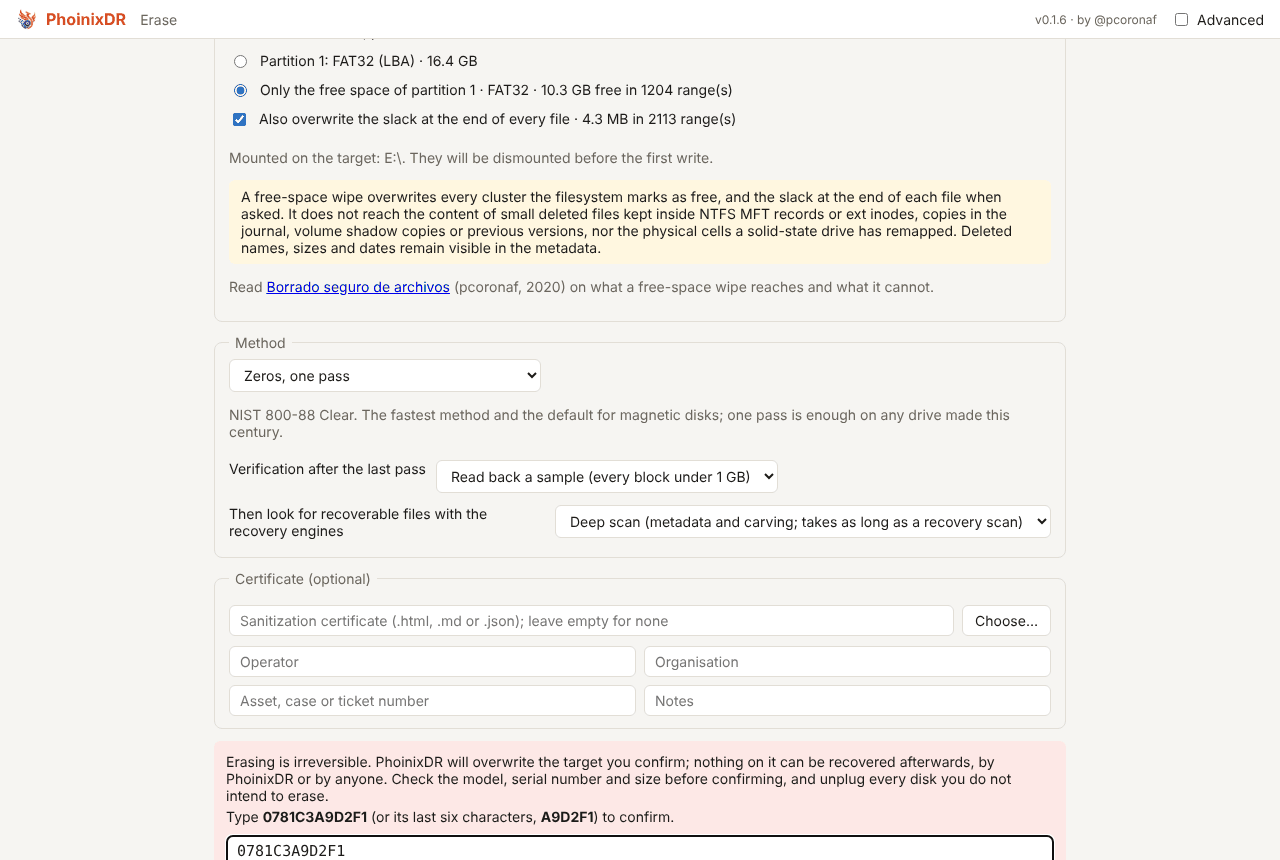
From the disk's page (raw): choose Only the free space of partition N. The volume is read with the same NTFS, FAT, exFAT or ext engine a recovery uses, its allocation map gives the free ranges, and the page shows how many bytes in how many ranges will be written. Tick Also overwrite the slack at the end of every file to include the bytes between the end of each file's content and the end of its last cluster, where fragments of older files survive; slack is taken only from live files whose layout is plain and complete (no compressed, sparse, encrypted or resident streams). The volume must not be in use: on Windows it is dismounted for the duration, on Linux you unmount it first. This mode needs administrator rights like every raw target.
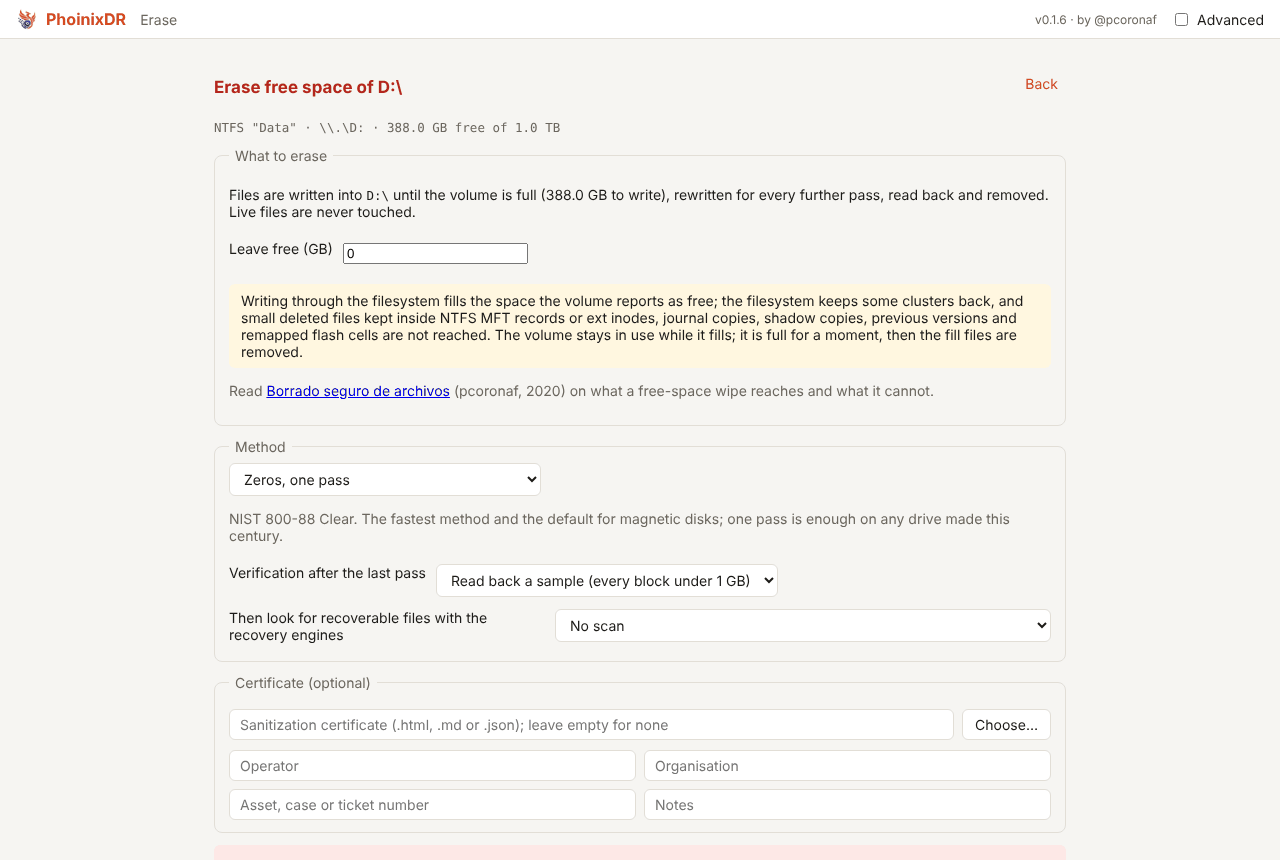
From a volume in use (through the filesystem): the second list on the erase page shows the mounted volumes. Choosing one fills its free space with files written through the filesystem until the volume is full, rewrites them for every further pass, reads them back and removes them. This needs no administrator rights and the volume stays usable, but it is full for a moment, so close other programs first; Leave free keeps some space back. It reaches what the filesystem reports as free, which is a little less than the raw mode: the filesystem keeps some clusters for itself.
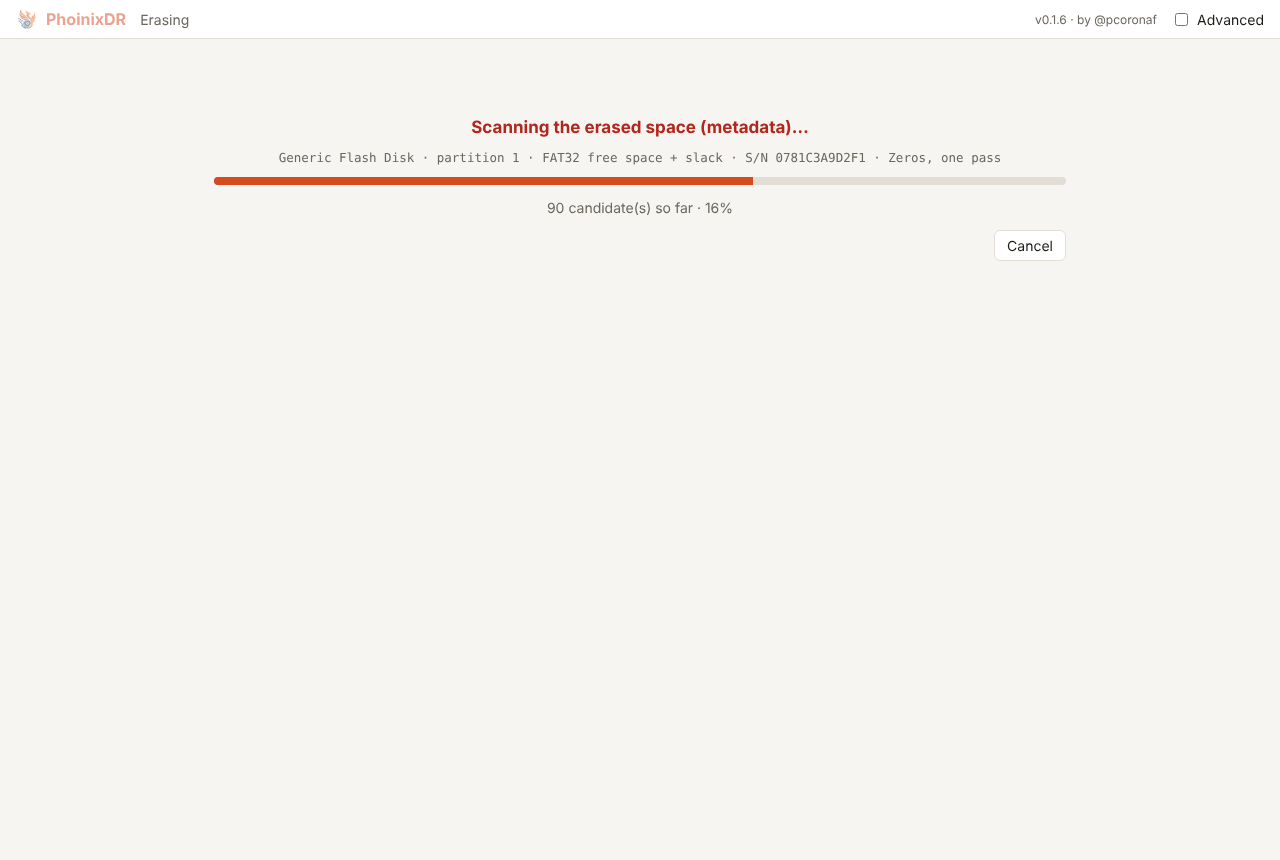
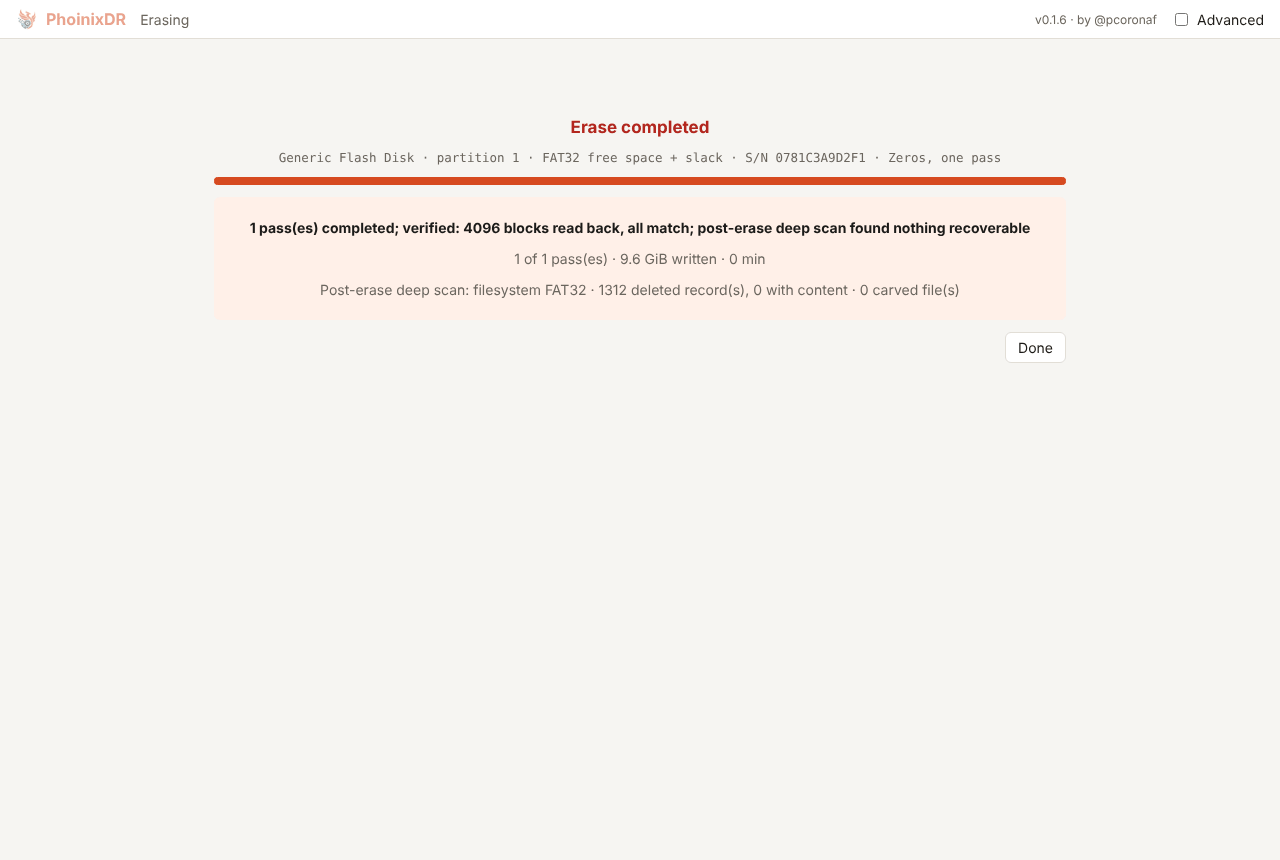
Neither mode reaches everything, and the page says so: the content of small deleted files that NTFS keeps inside their MFT records (and ext inside inodes), copies in the journal, volume shadow copies and previous versions, and the physical cells a solid-state drive has remapped are left as they are, and the deleted names, sizes and dates stay visible in the metadata. The post-erase quick scan reports the resident records it finds with content so the certificate is honest about them. Read the author's Borrado seguro de archivos (pcoronaf, 2020): overwriting a file by name does not reach the copies the system keeps, and the honest way to erase a file is to wipe the free space of its volume afterwards.
Files and folders
The third list on the erase page erases files and folders by name: Choose files… or Choose a folder…. Every file is overwritten through the filesystem with the chosen method, named streams included on NTFS (the Zone.Identifier a download carries, for instance), and padded to the end of its last cluster so that its slack goes too; then it is read back, truncated to zero length, renamed to a random name of the same length and deleted, and the folders are removed once empty. The page lists the files with their sizes, streams and read-only attributes (cleared before writing), says how many bytes each pass writes, and the certificate lists every file erased and every item that could not be. Symbolic links are skipped, never followed, and the running PhoinixDR executable is refused.
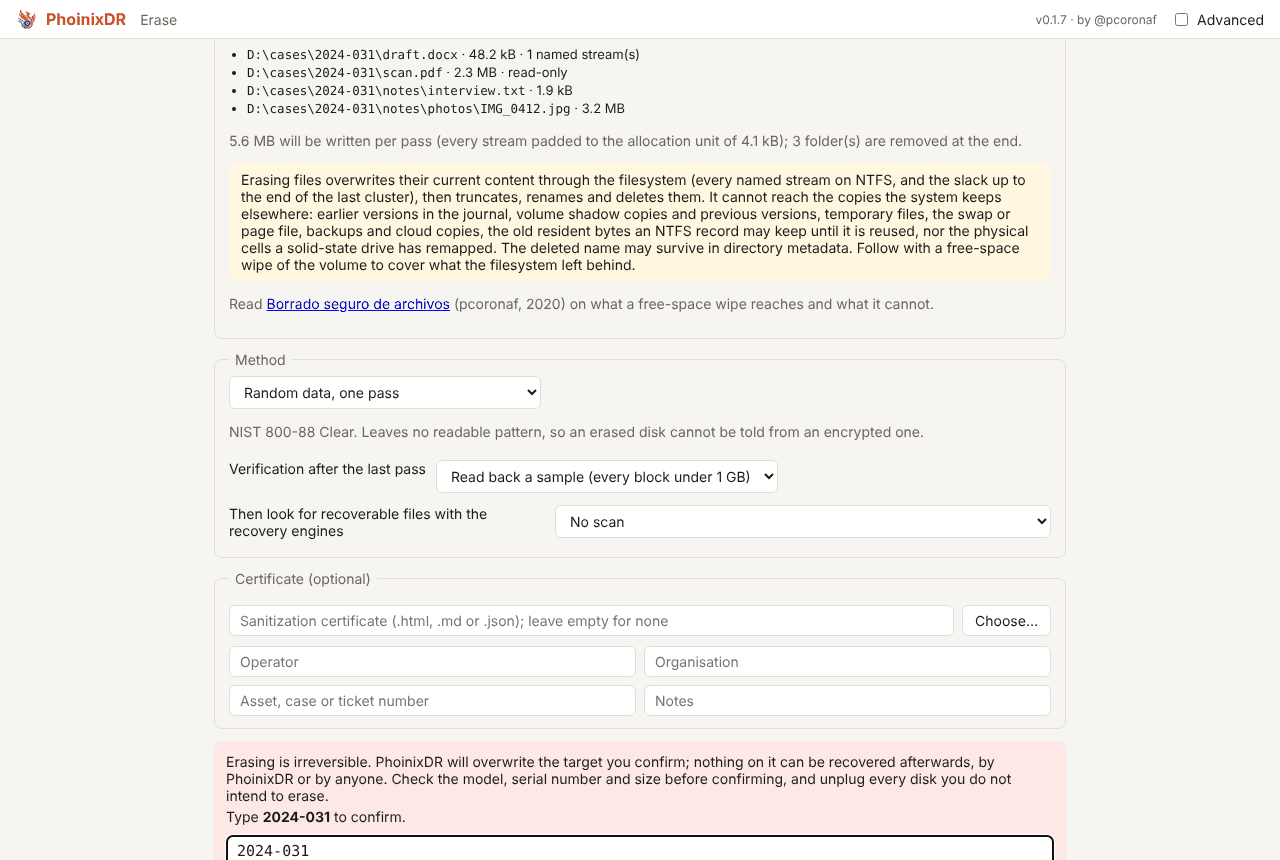
This is the operation the author's Borrado seguro de archivos (pcoronaf, 2020) warns about, and the page says what it cannot reach: earlier versions in the journal, volume shadow copies and previous versions, temporary files, the swap or page file, backups and cloud copies, the old resident bytes an NTFS record may keep until it is reused, and the remapped cells of a solid-state drive; the deleted name may survive in directory metadata. The honest sequence is therefore: erase the files, then wipe the free space of their volume. The optional post-erase scan counts only the erased names (it needs administrator rights to read the volume).
The drive's own sanitize (SSDs)
A software overwrite reaches an SSD's logical blocks, not its cells: the controller remaps writes, and over-provisioned or retired cells keep their old content. The honest erase of a solid-state drive is the one the drive runs itself, NIST SP 800-88 Purge. When a whole disk is chosen, PhoinixDR asks the drive what it offers (ATA IDENTIFY DEVICE, NVMe Identify Controller) and lists the answers at the top of the method picker, preselected on a solid-state drive:
- Cryptographic erase (ATA CRYPTO SCRAMBLE EXT, NVMe Sanitize crypto erase, NVMe Format with crypto erase, and on most SSDs the ATA enhanced security erase): the media encryption key is replaced and every sector reads as random data. Seconds.
- Block erase (ATA BLOCK ERASE EXT, NVMe Sanitize block erase): every NAND block is erased, remapped ones included. Minutes.
- Overwrite by the device, and the ATA security erase (normal and
enhanced) for drives without the SANITIZE feature set. The security
erase sets a temporary password,
PhoinixDR, and removes it again; if a drive ever stays locked after a failure, that is the password to unlock it with.
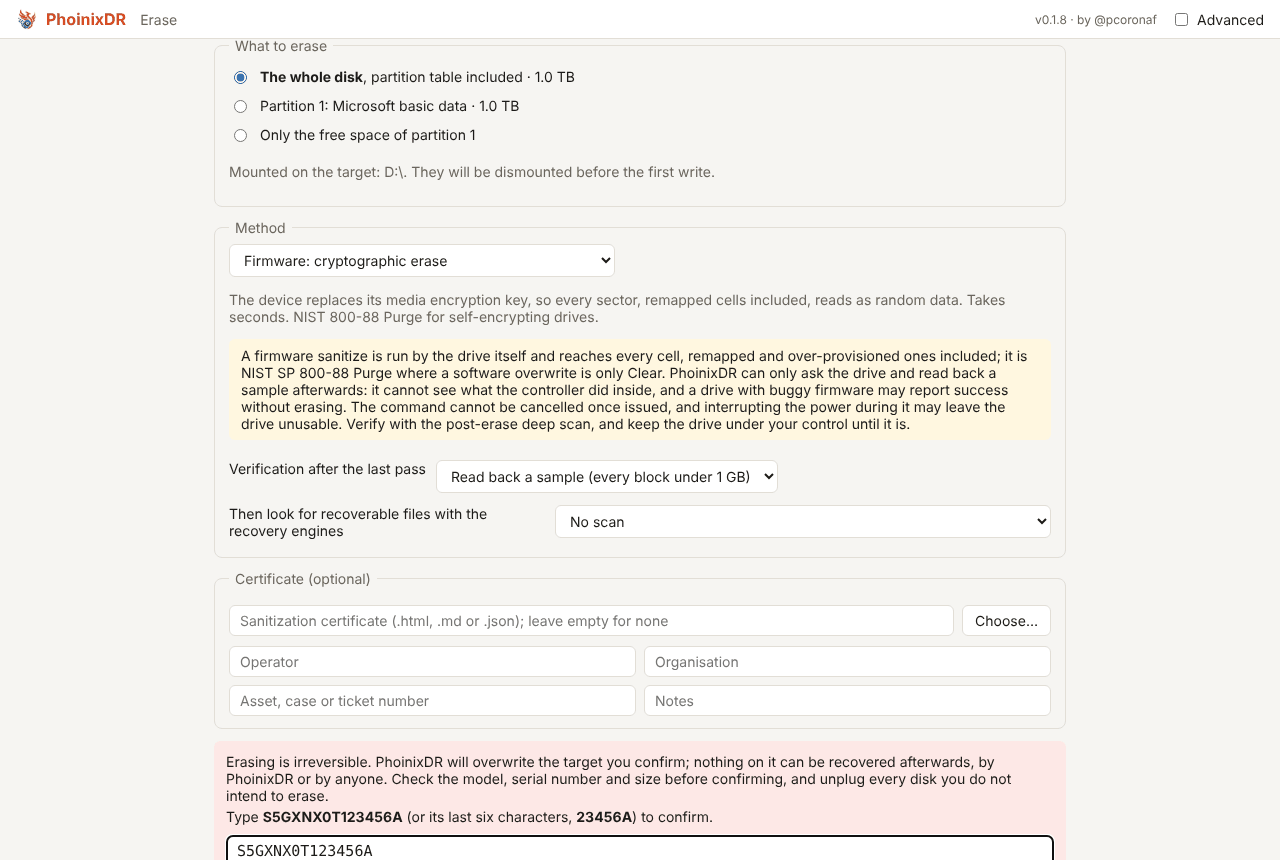
Before the command PhoinixDR reads a sample of 256 blocks spread over the drive and keeps their hashes; afterwards it reads the same blocks again: a block that held data and reads the same is a mismatch, and the certificate says so. The command cannot be cancelled once issued, and cutting the power while the drive works may leave it unusable. Run the post-erase deep scan too: PhoinixDR can only ask the drive and look at the result, never see what the controller did inside, and firmware with bugs has been known to report success without erasing.
Two things get in the way, and the page says which:
- Frozen. Many BIOSes freeze the ATA security feature set at boot, so the security erase is refused. Put the computer to sleep and wake it up, or unplug and replug the drive's SATA power with the system running, then press Refresh; a live Linux system is the usual way around a BIOS that always freezes. The SANITIZE commands are not affected by the frozen state.
- Not reachable. USB bridges rarely forward ATA or NVMe commands, and
the Windows inbox NVMe driver forwards only vendor-specific ones, so on
Windows an NVMe drive usually offers nothing; a live Linux system with
phoinix erase device /dev/nvme0n1 --method firmwaredoes. The page then falls back to the software overwrite and says it is a Clear, not a Purge.
This part of PhoinixDR was written against the ATA and NVMe specifications and tested against simulated drives, not against every real one: treat the first use on a model as a test on a disposable drive.
Sessions
Every scan is saved as a session (.phx) in the application data
directory and listed on the home page. Reopening a session reopens the
source at the same volume (repairs included) so previews and recovery
work later without rescanning. Sessions can be opened from any path with
Browse….
Privacy
The application does not contact the network. Logs (-v on the command
line, none in the desktop) never contain recovered content.